Monday, December 29, 2014

The Wonders of Rosemary


By: Genevieve Melzer

Herbs and spices are food changing ingredients. They also can make your food healthier, by adding flavor without adding unhealthy additives such as to much salt and sugar.

In this recipe I use the popular culinary herb rosemary. After doing a bit of research I found out that rosemary is extremely good for you.

Rosemary is good for the immune system, increasing circulation and improving digestion. Rosemary also contains anti-inflammatory compounds that are useful to reducing the severity of asthma attacks.

Rosemary has also been shown to increase concentration by increasing the blood flow to the brain. Rosemary is truly a superb herb! Not only does rosemary smell amazing and add wonderful flavors to food but it also helps you in so many other hidden ways.

Herbs are also super easy to grow, so if you are thinking of starting your own garden try an herb garden first. How amazing will you feel when you are eating organic herbs that you grew yourself.


Rosemary Potatoes

You will need:
4 red potatoes
2 sprigs of fresh rosemary
4 tablespoons of olive oil
½ teaspoon salt
½ teaspoon black pepper

Preheat oven to 350 degrees
Grease a 9 x13 inch Pyrex pan with 1 tablespoon of olive oil.
Thinly slice the potatoes.
Layer one layer of potatoes on the bottom of the pan sprinkle with one pinch of salt and pepper.
Pick fresh rosemary from the sprig and sprinkle all over the potatoes; make sure all potatoes have at least one piece of rosemary on them. (Use ½ sprig rosemary for each layer of potatoes)
Sprinkle 1 tablespoon of olive oil over first layer of potatoes and add another layer of potatoes. Sprinkle salt, pepper and rosemary over new layer of potatoes. Repeat until all potatoes and other ingredients are used.
Place in the oven and bake for 40 minutes.
Note: Your kitchen will smell amazing when these rosemary potatoes are cooking.
After 40 minutes take out of the oven and let cool for 5-10 minutes.
Serve and enjoy!

Another way to get rosemary into your daily food routine put a couple of sprigs of fresh rosemary into some olive oil to infuse it. Then use that olive oil as a dipping sauce for veggies and other snack foods.

Next time you are cooking try to add herbs and spices to your food instead of salt or sugar and see what kind of delicious concoctions you come up with.


Friday, December 19, 2014

Rich Chocolate "Soft Serve"


By: Elizabeth Beals

I found this recipe floating around the internet and thought it would never work. There is no way a frozen banana would taste like soft serve ice cream. Low and behold I was wrong! Not only does taste it taste just like soft serve, but I can dress it up with whatever I'm in the mood for. Chocolate, peanut butter, coconut flakes, or frozen fruit for strawberry ice cream or peach! The list is as long as your imagination.  The hardest part of this recipe is waiting for your bananas to freeze and picking your flavor.

One frozen banana in a blender

You will need: 
1 banana (frozen) 1 per serving
1 tablespoon dark coco powder
1/2 tablespoon maple syrup
1/4 or less almond milk

1. Place frozen banana in a blender with the coco powder and maple syrup.
2. Blender together while slowly adding in the almond milk until you get the right consistency of soft served ice cream. Don't over blend or it will melt into a liquid, it will still taste good just not what we are looking for. You may need to scrape down the blender to mix it all in.

Serve right away with some extra toppings if you like. I love coconut flakes on mine.
This is great for kids and holiday parties coming up. Make a big batch and freeze it for later. It will scoop more like ice cream if you freeze it for an hour or so. Most people will never be able to tell that this isn't chocolate ice cream. I won't tell if you don't.

Before: Choclate Ice Cream with Coconut flakes. 

After: Clean bowl and a happy lady!


Tuesday, December 16, 2014

Homemade Laundry Soap

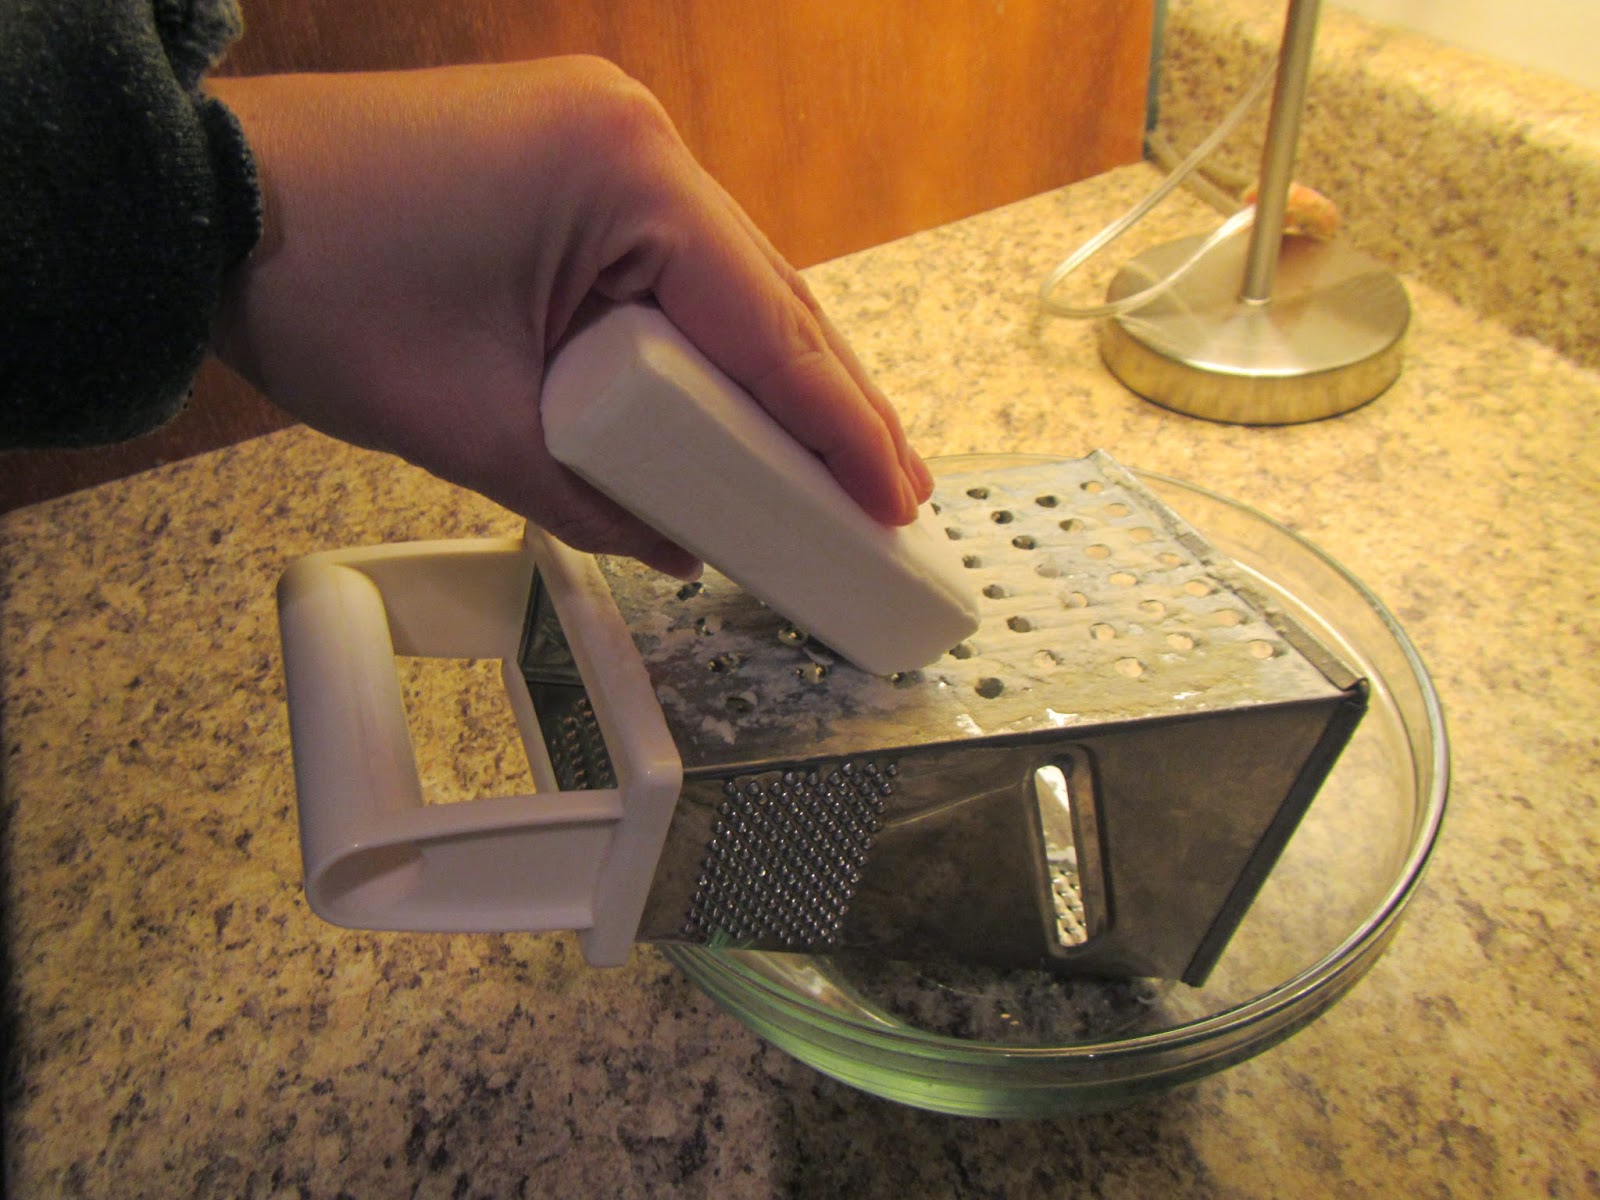
Making a double batch so I needed two bars of soap

Homemade Laundry Soap

by: Elizabeth Beals

2 cups soap flakes (1 bar of soap, I use Ivory)
2 cups baking soda
1 cup washing soda
1 cup borax
Tools: cheese grater, container with a lid 


1. Use a cheese grater for your bar of soap. (I have a cheese grater that I use only for this)

2. Mix soap flakes, baking soda, washing soda, and borax.

That's it! You now have laundry soap. I have been using this recipe since 2007! It keeps my clothes clean with 1/4 cup in cold or warm water.
Washing soda and borax can sometimes be hard to find in stores. When I first started making this I had to special order them from my local grocery store. If you ask them nicely, most stores will do this. Target and even Winco carry them now, because they have gained popularity in recent years for their cleaning power.  
Not only is this MUCH cheaper than buying a brand name laundry soap, it's better for the environment too! No harmful dyes or chemicals, and it's easy on sensitive skin. 

One step at a time, trying to be better to myself and our Mother Earth.


Wednesday, December 10, 2014

Gingersnap Cookies 100% Vegan


By: Genevieve Melzer

'Tis the season of giving and indulging in special holiday treats. Sometimes as a vegan you can’t have all the holiday desserts that other people are enjoying. We here at Two Girls and One Organic Garden are here to change that, we want you to be able to eat desserts that not only taste good but are made with the best ingredients out there.

Baking cookies is always a fun activity around this time of year and I encourage you to throw on some Christmas music when you make this recipe.

You will need:

2/3 cup melted coconut oil
1 cup coconut sugar
3 tablespoons flax milk (Option: can use almond or coconut milk)
¼ cup molasses
1 teaspoon vanilla
2 cups gluten free all purpose flour
2 teaspoons of baking soda
1 teaspoon of cinnamon
1 ¼ teaspoon of ground ginger
½ teaspoon of ground cloves
¼ teaspoon of nutmeg

Preparation Procedures:

1. Preheat oven at 350 degrees
2. In a large bowl combine the oil and sugars. Beat in the flax milk, molasses and vanilla.
3. In a separate bowl add the flour, baking soda and spices then stir together.
4. Add the dry flour mixture in the wet mixture and stir together until mixed completely and is a dough consistency.
5. Place bowl with dough in the “ice box” (refrigerator) for 30 minutes.
6. On a heavily floured surface scoop a 2” amount of dough and roll into a ball then roll out the ball using a rolling pin or anything else that rolls dough out, like a wine bottle. Roll dough out to ¼ of an inch if possible.
7. Use cookie cutters to cut shapes into the rolled out dough, remove excess dough and use a spatula to remove cookie from surface and place on an ungreased baking sheet. Repeat until all dough is used.
8. If you are short on time you can also scoop out 1-2” balls and place on cookie sheet. No rolling pin or cookie cutters needed.
9. Place cookies ½“ away from the other cookies on baking sheet. Feel free to decorate cookies with sprinkles before you bake them.
10. Place in oven and bake for 8-10 minutes and 10-12 for the scooped out ball cookies.
11. Let cool and serve.

Tip: These cookies go great with a glass of cold coconut milk eggnog.

This recipe makes about 20 cookies (6-8) per baking sheet. Try to share these gingersnaps with friends and family…although they are tough to share because they are so delightfully delicious. Have a happy and healthy this holiday season.


Friday, December 5, 2014

Lemon Green Falafels


   The cool thing about these falafels, besides being packed with healthy greens, is that they can be served in a variety of different ways. One of my favorites is as a bite size appetizer for a party or light lunch. They can also be served over a bed of greens in a salad, or I've even shaped them like a link before I fried them and rolled them in a rice wrap with stuff like shaved carrots, my sweet cucumbers, sprouts and a spicy aioli. With hummus to dip my "falafel spring-rolls" in. So. Good. No matter how you eat them, I am quite confident you will like them.

By: Elizabeth Beals

Lemon Green Falafels
Ingredients:

4 cups of dark leafy greens (swiss chard, spinach, kale) stemmed, deveined and ruffly chopped 
1 can 15.5 ounce chickpeas, drained and rinsed
2 tablespoons tahini
1 1/2 tablespoons garlic, minced
1/2 teaspoon lemon zest
2 tablespoons lemon juice
1/2 cup fresh parsley, stemmed and ruffly chopped
1/2 teaspoon ground cumin
salt and pepper to taste
3-4 tablespoons of oat flour
1/4 cup grape-seed oil


Tools or special equipment: 

large bowl food processor
medium mixing bowl
large frying pan
wax paper

Preparation and procedures: 
  1. Place all ingredients Except: oat flour, grape-seed oil, in food processor.
  2. Blend the mixture until all combined into a wet, sticky, dough-like mixture.
  3. Transfer mixture to a medium bowl and stir in the oat flour one tablespoon at a time. You want to thicken the batter just a bit, making it easier to handle and form into a small patty shape.
  4. Wet your hands to help the mixture not stick to them and start to forming your patty. About 2 tablespoons of mix per falafel, then place on wax paper. Re-wet your hands if needed. 
  5. Heat oil in a large frying pan, over median low heat. (Be aware that grape seed oil has a low burn temp, and may smoke if the pan gets too hot.) Keep the pan moving when frying the falafel so it won't stick to the pan.
  6. Cook for 2-3 minutes on one side, checking to make sure they aren’t browning too quickly. If so, lower the heat. Flip once until golden brown and cook for another 2-3 minutes or until golden brown color is reached. 
  7. Place finished patties on a paper towel, serve when hot.  
I eat my falafels with hummus and shaved carrots on top, served with sweet cucumbers and a spicy aioli drizzled over it all.

 Sweet Cucumbers

Ingredients:

1 cucumber with the skin peeled off
3/4 cup beet sugar
1 cup rice wine vinegar 

Tools or special equipment: 

mandolin 
medium mixing bowl

Preparation and procedures: 

1. Mix sugar and rice wine in the bowl
2. Use the mandolin to slice the cucumbers almost razed thin
3. Soak the cucumber slices in the sugar mixture for at least an hour


   Spicy Aioli

Ingredients:

1/2 cup vegan mayo
juice of 1 lemon
1 teaspoon fresh garlic, minced
sriracha to taste
pinch of salt

Preparation and procedures:

1. Mix everything together
Keep in glass jar.


Thursday, December 4, 2014

A Vegan Thanksgiving

By: Genevieve Melzer


This thanksgiving was truly a magical feast as almost everything was vegan. I was the only vegan at my thanksgiving but it was at my house so I thought my house my rules. I had no part in dealing with or cooking the turkey and it felt good to stand by my beliefs and make everything else completely vegan.

We had mashed potatoes made with earth balance and almond milk, mashed yams also made with earth balance, almond milk, cinnamon and a pinch of salt. I bought two vegan pies from WholeFoods and vegan cornbread stuffing. We had vegan shallot and thyme gravy that was delicious. I also made a vegan green bean casserole which I had never made before and it was very simple so I decided to share the recipe with you.

Vegan Green Bean Casserole

You will need:
3, 15 oz cans of green beans
1 jar of sliced mushrooms
1 cup of almond milk (unsweetened)
2 tablespoons of cornstarch
½ teaspoon Salt
½ teaspoon black pepper
½ teaspoon garlic powder
1 can French Fried onions

Preheat oven at 350 degrees
Drain green beans and mushrooms and mix together in a large bowl. Season will salt, pepper and garlic powder.
Pour seasoned green beans and mushrooms into a casserole pan.
In a small saucepan heat the almond milk, do not bring to a boil. When almond milk is warm add the cornstarch and stir and heat on low until mixture is thick, may take 5-10 minutes.

When the almond milk mixture is thick; pour all over green beans and mushrooms in the casserole pan. Place in oven for 25 minutes. Remove from oven, sprinkle French Fried Onions all over top of the casserole and return to the oven for 5-7 minutes.
Remove from oven and let cool for 5 minutes and serve while the casserole is still warm.

This green bean casserole is perfect for older relatives who are used to having this dish at Thanksgiving, the best part they can’t tell its vegan.

Another dish we made was a cranberry sauce from scratch that was very simple. Here is that recipe.

Homemade Cranberry Sauce
You Will Need:

4 cups of raw cranberries
2 oranges juiced (juice needed only)
1/2 cup coconut sugar
1 Apple chopped up into small pieces
In a medium sized bowl mix cranberries, orange juice, coconut sugar and apple pieces altogether.
Pour mixture into a medium sized saucepan and turn on a low to medium heat.
Cook for 20 minutes or until the mixture is completely cooked and looks like cranberry sauce, stirring occasionally.
Let cool for 10 minutes and serve and enjoy.

Cooking on Thanksgiving is quite the undertaking, but it is also very rewarding when other people tell you how much they enjoy the food you spent the day slaving over to make. This Thanksgiving was very special to me because I stayed true to my beliefs and my family completely supported me too. It was also a celebration because my boyfriend just proposed to me a week before Thanksgiving and I said “yes” so our families came into town to celebrate with us.
Supportive family, amazing friends and delicious food is what Thanksgiving is truly about.

Wednesday, November 12, 2014

Beet & Black Bean Burger


By: Genevieve Melzer

Sometimes you just want a hearty meal, like a bowl of pasta or a burger. I enjoy veggie burgers from time to time but a lot of the store bought veggie burgers have cheese and natural flavors in them. A good vegan burger is hard to find. Awhile back I had a delicious beet burger at this burger joint called Eureka, so I tried to recreate it with my own spin.

My partner in crime Elizabeth Beals already wrote about how to roast beets so if you are unfamiliar go back and read her insightful post on beets. After your beets are roasted you will combine them with the beans and other ingredients listed below.
I also created my own “honey mustard” sauce to serve on the burger, using agave instead of honey to make it bee friendly.

This burger is delicious; it has cilantro and onion to add some extra flavors to the beans and beets. This recipe is a true testament that you can be vegan and not miss out on savory flavors.


You will need:

6 beets (3 yellow and 3 red)
1 cup of black beans
½ onion
4 tbsp of fresh cilantro
Olive oil
Salt

Preheat oven for 350 degrees
Cut off ends of beets and cut beets in half, put beets in a casserole dish drizzle with 2 tbsp of olive oil over beets.
Cook for 60 minutes, half way through cover with tin foil. Take beets out and tell cool.
While beets are cooling chop up onion and sauté with 2 teaspoons or olive oil, cook until golden brown, set aside.
Peel skin off of beets and cut into small pieces, place beets in food processor or blender add black beans, onions, cilantro and pinch of salt. Blend/puree for a few minutes; blend until mixture is pureed with some big chunks left in it.
Tip: Wear an apron while making this recipe, beets are very messy and stain clothes.
Cover baking sheet with tin foil, scoop mixture out of blender, scoop 4-6 big scoops into patty form, recipe makes 5 or 6 patties.
Bake for 30 minutes.
While patties are baking, make your Agave Dijon Mustard sauce.
2 tbsp of Dijon mustard
1 tbsp of agave
In a small bowl add mustard and agave and stir together well.
When patties are done serve on a gluten-free bun or bread and garnish with arugula, tomato and agave Dijon mustard sauce.
Serve and enjoy!

This is one of my favorite recipes I have created thus far; hope you enjoy it as much as I have.

Tuesday, November 4, 2014

Baby Steps to becoming healthier!

Homegrown Pumpkins Happy Fall
By: Elizabeth Beals
Baby Steps:
 
  When first beginning this journey into the unfamiliar world of whole foods and cooking from scratch, it might feel a little over whelming. You might even feel like you are going thru a type of withdrawal, from convenience foods, fast food or just craving mom's good ol' home cooking. Trust me I understand,  I really do. Sometimes I feel like Dr. Jekyll and Mr Hyde when it comes to picking out my food. I fight between what I think I want and what I know is best for my body. For me, eating the wrong type of food doesn't just add pounds to my frame, in some cases it can cause real discomfort and pain. 
    It will get easier,  I promise.  Not to say that you won't still struggle from time to time and that's okay.  Just don't give up if you slip up. Keep moving forward.  Just because you made one bad decision, doesn't give you permission keep making them.
    With each meal we all have choices to make, whether it be eating organically, locally, or cruelty free. Choosing to eat food that was humanely raised and grown with love. Eating to fuel your body with nutrients that were minimally processed and not made in a factory, but in your very own kitchen.
    If this journey does seem a bit over whelming,  take baby step. Slowly replace the unhealthy foods with clean whole foods. Like with any change it's going to take some time before it becomes a habit. Start with eliminating something from your diet that you know you won't miss. If you aren't a big red meat fan great, check that off the list. If milk always made you feel a little bloated or uncomfortable like it does me then switch to a dairy free alternative like rice milk or almond milk. Milk was easy, but cheese was and is still hard for me. I love cheese even though it doesn't love me back. I was willing to suffer through the uncomfortable after effects because I loved it so much and it was in some of my favorite dishes. I have yet to find a dairy free option that isn't pretty processed. Remember, just because it's vegan doesn't mean it's necessarily nutritious and good for you.
    This way of living might not be easy at first. It kinda feels like swimming up stream against all the easy and fast foods of today. Stay focused, surround yourself with like minded people to help inspire you and keep you on track. This blog started as way for two like minded ladies to keep in touch and encourage one another. We now hope to pass along our insight to others hoping to better themselves thru better choices in food.

Wednesday, October 29, 2014

Pumpkin Cupcakes

By: Genevieve Melzer

October is a wonderful month, the leaves start to change, the holidays are just around the corner and my birthday is at the end of the month. As a Halloween baby, I look forward to Halloween/my birthday every year. People have always asked me if I liked sharing my birthday with Halloween and I always respond the same. I love having my birthday on Halloween, everyone always wants to party and dress-up it’s the best birthday ever.

Due to fact I am a Halloween baby, I am a total pumpkin-holic, meaning I crave everything pumpkin when it is October and November. I love when I start to see pumpkins for sale and the stores launch their lines of pumpkin goodies.

I have seen pumpkin bread, pumpkin soup, pumpkin waffles, pumpkin ice cream, etc. and none of it is vegan. So this year I decided to make my own delicious pumpkin goody. I decided to tackle pumpkin cupcakes; I knew that I could make delicious vegan pumpkin cupcakes.

You will need:
1/3 earth balance (or another vegan butter)
3/4 cup coconut sugar
3/4 cup Organic pumpkin puree
6 tablespoons of almond milk (or another milk alternative)
1 tablespoon of Vanilla extract
1 tablespoon of pumpkin spice
2 teaspoons of baking powder
1 cup oat flour
1/4 teaspoon of salt

1. Preheat oven at 350 degrees and place cupcake liners in the cupcake tin (use a cupcake tin that makes one dozen cupcakes)
2. Cream the earth balance and sugar together.
3. Add pumpkin puree, almond milk and vanilla extract and mix well.
4. Sift in pumpkin spice, baking powder, oat flour and salt, stir until combined.
5. The batter is now ready to scoop into the cupcake liners. Scoop one large spoonful into each cupcake liner in the tin. If extra batter add to each cupcake.
6. Place in oven and bake for 25-30 minutes.
7. To make sure they are done, use a toothpick and place it in the middle of one of the cupcakes and push down, then pull the toothpick out. If it comes out clean they are ready.
8. Let cool for 30 minutes.


While your cupcakes are baking you can start on the glaze. The glaze is a maple-pumpkin glaze and very easy to make.


Maple-Pumpkin Glaze

Maple-Pumpkin Glaze


½ cup pumpkin puree

2 pinches of pumpkin puree

2 tablespoons of maple syrup

1. In a medium sized bowl put in the pumpkin puree
2. Add the pumpkin spice and maple syrup and stir together until completely combined.
3. When cupcakes are done and cool, use a butter-knife to spread the glaze on the cupcakes.
4. The best part…eat them up!

There you have it my recipe for Pumpkin Cupcakes with a maple-pumpkin glaze, I hope you try this recipe and enjoy it as much as I did. From Two Girls & One Organic Garden have a happy Halloween!


Friday, October 3, 2014

Roasted Corn and Quinoa Salad with a Mustard Dressing


By: Elizabeth Beals 

 It may be Oct, but it's still pretty warm in Northern California. We are reaching up into the 90s where I live. This
nice end of summer, beginning of fall salad works great for lunch. It's even better the next day.
 You can still find fresh corn and a great rainbow of bell peppers this time of year. In my garden right now we have Blue Jays, Spanish Sweet Reds and Orange bell peppers to choose from. 
 This recipe can be modified to your liking or based on what ingredients you already have on hand. The mustard dressing is an easy one to pull together and would go well with just a basic green salad.

Ingredients:
2 ears of corn; grilled with husks on, wrapped tightly in foil and cooked kernels removed from ear
1 tablespoon olive oil
salt and pepper
garlic powder
to sheets of foil, for the corn

1/2 cup cooked and cooled quinoa
1 1/2 cups of veggie broth or water

1 small red onion, finely diced
1 blue jay bell pepper (or yellow or red), finely diced
1/2 cup carrot, shaved
1/4 cup fresh parsley, chopped

Mustard Dressing:
2 tablespoons spicy mustard
1/4 cup rice wine vinegar 
1/2 extra virgin olive oil
1 tablespoon fresh parsley, finely chopped

Tools or special equipment:
grill
sauce pan
sharp knife
whisk
1 large bowl (for salad)
1 small bowl (for dressing)
foil

About 30 mins of prep time. Corn and quinoa can be cooked and grilled ahead of time to make things go a bit faster. This salad will last about 3-4 days in the ice box.

Preparation and procedures: 
1.a. Pull back the husks to expose the silk hairs on the corn, but do not remove them. 
1.b. Remove the silk hairs and oil the corn. 
1.c. Sprinkle salt, pepper, and garlic powder on the kernels. 
1.d. Pull the husks back around the corn to protect it from the flames.
1.e. Tightly wrap the husks in foil and place on a med high grill for 20 minutes, turning once.

2.a. Rinse and drain quinoa before putting it in a sauce pan with 1 1/2 cups veggie broth or water.
2.b. Bring quinoa to a boil and cover reducing the heat to simmer. Cook for 25 minutes. Quinoa is done when you see little white tails pop out.

3. Finely dice red onion and bell pepper, shave carrots and finely chop fresh parsley, place in large bowl.

4. Whisk all dressing ingredients together in a small bowl and set aside.

5.When corn is cool to the touch, use a sharp knife and shave the kernels from the ear into the large bowl. 

6.When the cooked quinoa is cool mix it in the large bowl as well. Stir well. 

7.Can be eaten now or placed in the ice box for when you are ready. Don’t dress the salad until ready to eat.

Yield about 3 to 4 cups of corn, quinoa mixture

Tuesday, September 23, 2014

Avocado Toast

By Genevieve Melzer

This summer I was craving avocados like never before, I love avocados in things like guacamole, in fact I can sit down and eat an entire bowl of guacamole.

I wanted a recipe for the morning that had avocado in it. As a vegan many breakfast items are off the table, I used to enjoy eggs and even bacon on certain occasions but now I must be more creative with my breakfast choices. While visiting my sister in Los Angeles last month I tried “avocado toast” a relatively easy recipe I was shocked I had never thought of making.

At the restaurant we went to the avocado toast had eggs on top of it so I omitted the eggs and didn’t miss them even a little.

After consuming the whole meal down to the last morsel, I realized this was something I could make at home that would be super easy in the morning when I’m trying to rush to work.

After doing a little research I understood that not only did avocados taste good but they were super healthy too. Here are a few things I found out when researching them…

The average avocado has almost 30 grams of fat in it. The avocado is considered a good type of fat because it is a monounsaturated fat which is beneficial to lowering bad cholesterol.

Avocados are a good source of fiber, potassium and vitamin C.

Also avocados have high levels of vitamins B, K and E.

Avocados are high in oleric acid which has been shown to prevent breast cancer.

Here is one way to make avocado toast, but please feel free to be creative with this recipe and add other spices that appeal to your senses.


Avocado Toast Recipe

What you need:
1 avocado
2 slices of Ezekiel 7 Sprouted Grains Bread or any other gluten-free bread
Place bread in toaster and toast to desired level
While toasting the bread, cut up avocado into small pieces and place in small bowl
Add ½ teaspoon of cumin and ¼ teaspoon of salt
Mash up avocado with the spices
Spread evenly on toast, sprinkle chia seeds over top.
Serve and enjoy.

This recipe should take you less than 10 minutes to prepare.

This is an amazing way to start your day, and this avocado toast will fuel you for many hours. I guarantee you will feel so much better after eating this breakfast compared to the way your body feels after consuming bacon and eggs.

Until we meet again pursue your bliss, follow your heart and send lots of love into the universe.


Tuesday, September 16, 2014

Banana Oatmeal Cookies

By Genevieve Melzer

Bananas are one of my favorite fruits and I love trying them in different recipes. Bananas are also super healthy for you.

Bananas have high levels of vitamin B-6, strengthen your blood and are high in potassium. Bananas are also the perfect snack to have pre-workout because they will give you energy and keep your blood pressure up.

What do you do with bananas that are browning and past that perfect time of consumption?
Well, I googled that once because I had bananas that were brown and didn’t want to throw them away. I thought there must be something I can make with these and I found was a recipe for banana oatmeal cookies.

The best thing about these cookies is they are so easy to make, and you only need bananas and oatmeal. These cookies are so easy to make you can make them with your kids. All you need is to smash the bananas with the oatmeal.
This recipe is also great because no sweetener is needed; the bananas are sweet enough by themselves.

Feel free to add other ingredients too. Anything that you would add to another cookie recipe you can add to these.

You will need:
2 bananas (very ripe, the browner the better)
1 cup of oats

You only need these 2 main ingredients and then feel free to add 2 or 3 of the following…
Cinnamon
Nuts
Chocolate chips
Carob chips
Flax Seeds
Chia Seeds
Peanut or almond butter
Or anything else that sounds good to you.

Preheat your oven to 350 degrees. Grease baking sheet with coconut oil.
Mash bananas in a medium size bowl, then add oats and mix together. Add any other ingredients at this time, last time I made these I added ½ teaspoon of cinnamon, 1 teaspoon of flax seeds and ¼ cup of pecans.
Mix in all added ingredients and scoop small spoonfuls of the mixture onto the cookie sheet about one inch apart from each other. This recipe makes about one dozen cookies.
Bake for 15 minutes. Take out of the oven and let cool.
Serve and enjoy!

These cookies take under 20 minutes to make and are perfect for any occasion. Perfect for an after school treat or a late night snack.

Friday, September 12, 2014

Carrot Ginger Feel Good Soup

By: Elizabeth Beals

  This soup has completely replaced eating chicken noodle soup when I don't feel well. As a kid I loved the soup in the red can, you know the one. I can still almost smell it, and see the tiny squares of what I was told to believe is chicken in it. As an adult I understand that it wasn't really the soup that was making me feel good. It was the ritual of my mom bringing me something warm, and her taking care of me. There wasn't too much in the actual red can that was helping me to get better.
  This Carrot Ginger Feel Good Soup will actually help make you feel better. As a sufferer of endometriosis I am often faced with overwhelming nausea. Whether it's the common cold, or the occasional upset tummy, eating ginger plays a great role in fighting nausea. You can find it in many different forms, hot tea, homemade ginger ale, soups, and other dishes. I find that when I don't feel well a nice warm soup usually will do the trick, there's even fresh orange juice to give you a little vitamin C. To make this soup, it helps to have a nice blender, but your dorm room special will work too. The ingredients come together pretty quickly and it doesn't take too long to cook. The last place you want to be when you are sick is in the kitchen. I hope this soup finds you well or helps you get well. Enjoy, and be healthy.


Ingredients:
1 medium white onion, chopped
1 1/2 cups carrot, chopped
2 cups potato, chopped
1 heaping tablespoon, fresh ginger, grated
1 whole garlic clove, separated but unpeeled and tied in cheese cloth
4 cups veggie broth
1/2 cup fresh squeezed orange juice (1 orange)
2 teaspoons turmeric

2 teaspoons pure maple syrup
1/2 cups raw almonds
salt and pepper to taste

Tools or special equipment:
cheese cloth
micro plane (for grating ginger)
medium sauce pan
blender
ladle 

Preparation and procedures:
  1. Place all ingredients, except maple syrup, almonds, salt, and pepper in a medium sauce pan. 
  2. Cover and bring to a boil, then set timer for 20 minutes. Lower heat to simmer.
  3. After cooking for 20 minutes turn off heat. Throw away the cheese cloth bag with garlic in it.
  4. Ladle the soup into the blender with the almonds, maple syrup salt and pepper. You may have to do this step in two batches, if needed. Blend soup until very smooth.
  5. Pour blended soup back in sauce pan, taste and add more salt and pepper if needed. Eat while hot!

This recipe will give you a little more than 6 cups and it freezes very nicely. A great gift for a loved one that isn't well.


Tuesday, August 26, 2014

What the Bleep are Natural Flavors?

By: Genevieve Melzer

The definition of natural flavors given by the FDA Code of Federal Regulation is:

“The term natural flavor or natural flavoring means the essential oil, oleoresin, essence or extractive, protein hydrolsate, distillate, or any product of roasting, heating or enzymolysis, which contains the flavoring constituents derived from a spice, fruit or fruit juice, vegetable or vegetable juice, edible yeast, herb, bark, bud, root, leaf or similar plant material, meat, seafood, poultry, eggs, dairy product, or fermentation products thereof, whose significant function in food is flavoring rather than nutritional.”


Wow, that is a mouthful! After reading that but not understanding a few of the big words I do however get the gist of what is being said…basically natural flavors are an additive flavor that serves no nutritional function. The Food Industry uses natural flavors as an Umbrella term for many different additives.

So why are natural flavors added? If they aren’t adding a nutritional function why are they needed at all? Food companies are using natural flavors as a way to make their food more addicting. This is just another reason why we should all be growing and cooking our own food from scratch. Processed foods are full of natural flavors even healthy looking items or ones that say “all natural” are full of weird additives and strange chemicals.

What are a few “natural flavors”?
Natural flavors can be such things as MSG, Aspartame and Castoreum (which is made from sex glands of beavers…yes I’m serious…I know horrifying)
Some natural flavors include animal matter or dairy so they are not vegetarian or vegan but are allowed in vegan and vegetarian foods. Watch out if you are a vegan or a vegetarian because natural flavors are lurking on the back of almost all packaged food items.

What can we do?
I don’t want to make anyone feel powerless; there is always something you can do to change your situation and the world.

1. Read Labels: Don’t buy anything with natural flavors, it may be difficult at first because your body will be going through withdraws but once it’s out of your system you will triumph.

2. Call the company of the food and ask for example “What natural flavor is in this vegetarian split pea soup?” They should tell you and then look it up online and see what it really is and choose if you want to continue buying that product.

3. Write a letter to the food company and express your frustration with the use of natural flavors and the fact that you will not be consuming them anymore.

4. Grow your own food, start a small garden so you know exactly what your body is consuming.
Next time you are craving a piece of strawberry cake, or a bag of potato chips take a second and consider what might be hidden in that favorite snack food and opt out for the real version of that food that could fill that craving instead.

Till we meet again trust your instincts and stay positive!

Monday, August 25, 2014

What is Nutritional Yeast?

  by: Elizabeth Beals

   Nutritional Yeast is an amazing source of vitamins, minerals and protein for vegans and meat-eaters alike. If you buy the kind that is fortified with vitamin B12, (which I recommend) then you are getting 150 percent of the vitamin B12 (based on a two tablespoon serving). How amazing is that? Vegans often get asked, "Aren't you worried about getting enough protein in your diet?" First of all, there is a good deal of debate about how much animal protein our bodies actually need. If you would like to read more about animal based protein, and how it affects our bodies, I recommend reading the book The China Study. Second, if we as vegans are eating a healthy plant-based diet, and not just potato chips and soda, then we are most likely getting all the vitamins and minerals that our bodies need. B12 is a vitamin that we do miss out on; but, by simply adding Nutritional Yeast that has been fortified with B12 to our diet, we need not worry. We can have it all!

    Nutritional values vary from brand to brand but, on average, two tablespoons equals 9 grams of complete protein and provides all 18 amino acids, 9 of which the human body cannot produce itself. One serving of fortified yeast provides us with 20 percent of the recommended daily value of iron, and it is also a source of selenium and potassium. It is naturally low in fat and sodium it's also free of sugar, dairy, and gluten. In addition, because it is chocked full of the B complex vitamins, it helps your body to convert food to energy more easily, and can minimize depression, insomnia, nervousness, fatigue, trembling, loss of appetite, PMS, mood changes and irritability. Plus, our skin, hair, and nails will look great! I buy mine in the bulk section at the health food store.
 
 So, how do you use it, you ask? Well, my favorite way to eat it is on popcorn. A very simple snack or even a light meal. It has a cheesy taste and is the perfect replacement for parmesan cheese.

You will need:
Popcorn, as much or as little as you like to eat
1-2 tablespoons of oil, coconut oil gives a nice flavor, unless you are using an air-popper
Bragg's Liquid Aminos (a soy sauce alternative), just enough to lightly drizzle on the popcorn
Nutritional Yeast, use as much as you would parmesan cheese

1. Pop the corn kernels in a large sauce pan or a stock pot if you are making a lot, with a little oil. Heat the oil over a medium heat with the kernels in the pan and cover with a lid. Keep the pan moving so you don't burn the kernels. When the popping slows to one pop every 2-3 seconds, you are done.
2. Drizzle the popcorn with Bragg's to give it a salty taste and to help the Nutritional Yeast have something to stick to.
3. Sprinkle the Yeast over the popcorn and mix all together. I keep my yeast in a spice jar on the table to sprinkle on just about everything I eat. Mixing can either be done in the pot or a large bowl.

I hope you enjoy this easy snack and try Nutritional Yeast on other things. You never know until you try!


Thursday, August 21, 2014

Arugula Sweet Potato Salad


By: Genevieve Melzer

Every night my boyfriend and I discuss what we want to eat for dinner, and even though we are creative with our meals sometimes we are both stumped. We always want something healthy, delicious and filling; one night I came up with this salad, it satisfied all requirements.

Arugula is one of my favorite greens. If you have never had it, I strongly recommend you try it immediately. Arugula looks and tastes kind of like spinach with a spicy undertone. It was the perfect base for my salad.

You will need:
4 cups or 2 sweet potatoes
2 tablespoons of coconut oil
1 cup sliced red onion
¾ cup sliced tomatoes
4 cups arugula
1/3 cup chopped cilantro
2 tablespoons of olive oil
2 pinches of salt
2 pinches of pepper

Start by preheating your oven to 350 degrees. Thinly slice sweet potatoes and place in glass casserole dish, drizzle sweet potatoes with coconut oil, salt and pepper. Place in oven and bake for 30 minutes.

While your sweet potatoes are cooking, chop up the cilantro and tomatoes into small pieces and cut your onion into thin slices. When the sweet potatoes are cooked remove from the oven and let cool for 10 minutes.

In a big bowl place arugula, onions, tomatoes and cilantro, toss with olive oil and salt and pepper.

Take about 2 cups of the salad and place on plate or bowl, next add 1 cup of sweet potatoes on top. Serve and enjoy.

This salad makes about four healthy servings and won’t take very long to make especially if you cook your sweet potatoes ahead of time.

This salad is perfect to fuel your body after a tough workout or busy day in the garden. The arugula and the sweet potatoes complement each other nicely. This salad is only dressed with olive oil, salt and pepper it shows that salads don’t have to be smothered in a creamy dressing. I believe that a little bit of olive oil goes along way especially on a flavorful salad like this one.

I hope you enjoy this salad, until next time: eat healthy, love always and save the planet one decision at a time!

Wednesday, August 20, 2014

Pretty in Pink Hummus


by: Elizabeth Beals

   Hummus is one of those recipes that, once you get the hang of it, you won't need a recipe anymore. A little of this, and a little of that, whatever your heart desires. I love the color of this hummus, it's so bright and vibrant, I could eat the whole thing in one sitting. It's also a great way to hide veggies from kids and adults a like. I use this hummus for dipping veggies, and also to complete my falafel salads. It also works great as a spread on about anything.

Ingredients:
1 15-oz can of garbanzo beans, drained and rinsed
1 roasted beet, cut in half
1 Roma tomato, cut in half
1 tablespoon fresh garlic, minced
1 lemon juiced, about 2 tablespoons
1 tablespoon tahini 
1-2 tablespoons olive oil
1 teaspoon salt

Tools or Special Equipment:
Food processor with a large bowl.

Preparation and Procedures: 
  1. Drain and rinse the garbanzo beans, then place them in the food processor.
  2. Add the beet, Roma tomato, garlic, lemon juice, tahini, 1 tablespoon olive oil and salt to the food processor.
  3. Pulse the processor until you have a smooth texture, adding another tablespoon of oil  if the texture is too thick. Add the additional oil while the processor is still on.
  4. When you reach a creamy and smooth texture you know you're done. It's as easy as that!
Preparation Time:
 Roasting the beets will take about an hour, but if that is already done aprox. 5 minutes of prep.

Longevity:
3-4 days in the icebox, I keep mine in a glass mason jar.

Tuesday, August 12, 2014

Roasted Beets


by: Elizabeth Beals
Roasted Beets
     Many people pass up beets simply because they don't know what to do with them once they get them home. How do I cook with those big beautiful beets? I roast them of course! It takes about an hour, but 50 of those 60 minutes are spent however you would like because they are cooking away in the oven. I use beets a lot in my kitchen. Salads, burger patties, and even in hummus. 
Small beet next to a very small beet
Beets ready to be pulled
You will need:
Beets, 4 
Scrub Brush
Foil
8x8 glass baking dish
Oven

1. Preheat oven to 400 degrees

2. Take the green tops off your beets by twisting them away from the beet. Don’t cut anything at this point. Use a scrub brush to clean the skins of the beets with a little water.

3. Wrap the beets tightly in foil, and place them in a baking dish, I use an 8x8 glass dish, but anything pan or dish will work to catch any beet juice.

4. Cook for 50 to 60 minutes depending on the size. Bigger the beet the longer the cooking time. You will know when they are done because you will be able to easily put a butter knife through the cooked beet. Let them cool for a few minutes until you are able to touch them without burning yourself.  A skill I am still working on!

5. To remove the skins, rub the beet with your fingers and the skins should easily come off in your fingertips. Wear gloves if want, your fingers will get stained. 

6. After you have rubbed the skins off, cut the tail and top off, slice, dice or leave whole. Eat and enjoy.

I keep my roasted beets in a glass mason jar in the ice box (refrigerator) until I'm ready to use them. They don't last long in my kitchen I eat them too fast, but they will however keep for about a week.